Earlier in our blog series we shared information on application load testing with Apache JMeter and its logical architecture. Recently we had a chance to setup a performance testing infrastructure for an Apache OFBiz project. The goal was to put OFBiz under a heavy load to prove it was able to scale properly, and to do some capacity planning. Here, we are sharing a step by step guide to restore pre-build Amazon Machine Images to load test OFBiz.
I. Steps to search for and select Amazon Machine Images (AMIs)
II. Steps to restore Amazon Machine Images (AMIs)
III. Steps to connect with the newly launched instances
IV. Steps to start, stop, and check the status of the ofbiz instance
V. Steps to execute the JMeter scripts
I. Steps to search for and select Amazon Machine Images(AMIs)
- Create an account on Amazon AWS (https://aws.amazon.com/)
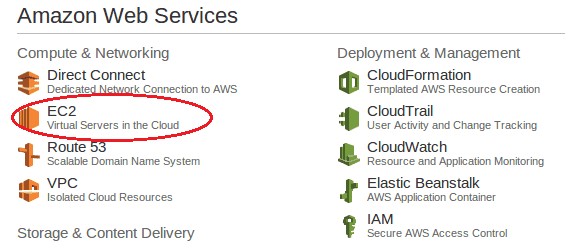
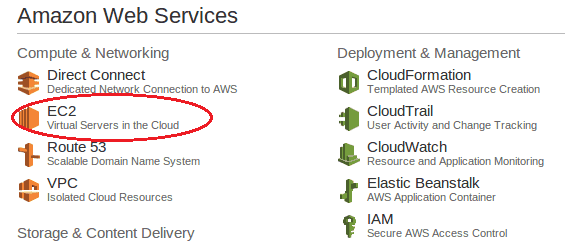
- Login into the application and go to Services -> EC2 (https://console.aws.amazon.com/ec2/v2/home?region=us-east-1#)
3. Select ‘US East (N. Virginia)’ area from the right top corner of the screen.
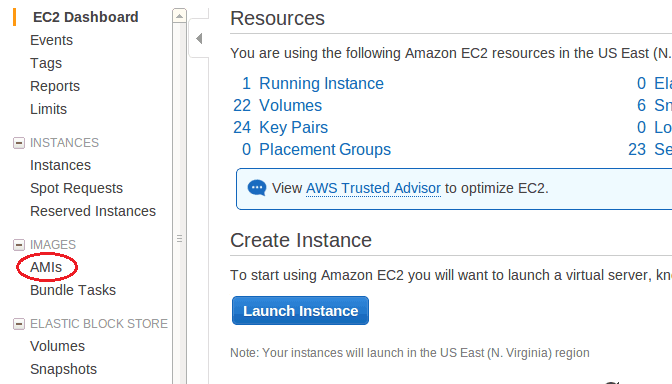
4. Select IMAGES -> AMIs from the left navbar of the screen
5. Select the search filter for ‘Public Images’ and search the specific images with the keywords mentioned below :
- Ofbiz-LoadTest-Apache-Instance
- Ofbiz-LoadTest-Code-Instance
- Ofbiz-LoadTest-Jobsandbox-Instance
- Ofbiz-LoadTest-MysqlDB-Instance
- Ofbiz-LoadTest-Jmeter-Instance
II. Steps to restore Amazon Machine Images (AMIs)
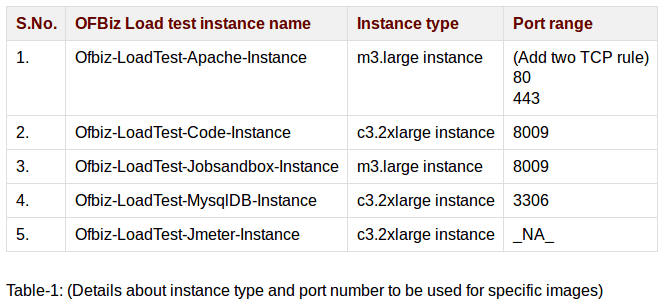
Once the above steps have been performed, we have a list of images available that can be selected and restored for performing further tests. The steps to restore the images are defined below. The respective values, type and port details of images for instance, can be referenced in the table below (Table-1).
- Select any of the image and click on the ‘Launch’ button.
- Select <INSTANCE_TYPE> and click on the ‘Next:Configure Instance Details’ button.
- Select options from the ‘Configure Instance Details’ form. (You can also continue with the default options.)
- Click on the ‘Next Add Storage’ button.
- Now click on the ‘Next:Tag Instance’ button.
- Add the name of the instance in the ‘Value’ field.
- Click on the ‘Next:Configure Security Group’ button.
- Click on the ‘Add Rule’ button to add the new TCP rule (Select Type: ‘Custom TCP Rule’, Protocol: ‘TCP’, Port: <PORT_NUMBER>, Source: ‘anywhere’).
- Click on the ‘Review and Launch’ button.
- Click on the ‘Launch’ button.
- Continue without creating new key pair
- You can see your newly created instance in ‘INSTANCES -> Instances’ link from the left nav bar.
- Select the instance and make note of the PUBLIC and PRIVATE IPs.
III. Steps to connect to the newly launched instances using the SSH command.
1. Ofbiz-LoadTest-Apache-Instance:
- ssh loadtest@<PUBLIC_IP>
— Enter password: “loadtest” - sudo -s
— Enter password: “loadtest” - vim /etc/hosts
- Replace IP address of ‘j2ee.loadtest.ofbiz.us’ with <PRIVATE_IP> of ‘Ofbiz-LoadTest-Code-Instance‘
- Save and quit
- Run command: /etc/init.d/apache2 restart
2. Ofbiz-LoadTest-Code-Instance:
- ssh loadtest@<PUBLIC_IP>
— Enter password: “loadtest” - sudo -s
— Enter password: “loadtest” - vim /etc/hosts
- Replace IP address of ‘j2ee.loadtest.ofbiz.us’ with <PRIVATE_IP> of ‘Ofbiz-LoadTest-Code-Instance‘
- Add IP address of ‘loadtestdb’ with <PRIVATE_IP> of ‘Ofbiz-LoadTest-MysqlDB-Instance‘
- Save and quit
- svc -u /service/loadtest.ofbiz.us
3. Ofbiz-LoadTest-Jobsandbox-Instance:
- ssh loadtest@<PUBLIC_IP>
— Enter password: “loadtest” - sudo -s
— Enter password: “loadtest” - vim /etc/hosts
- Replace IP address of ‘j2ee.loadtest.ofbiz.us’ with <PRIVATE_IP> of ‘Ofbiz-LoadTest-Jobsandbox-Instance‘
- Add IP address of ‘loadtestdb’ with <PRIVATE_IP> of ‘Ofbiz-LoadTest-MysqlDB-Instance‘
- Save and quit
- svc -u /service/loadtest.ofbiz.us
4. Ofbiz-LoadTest-Jmeter-Instance:
- ssh jmeter1@<PUBLIC_IP>
— Enter password: “loadtest” - sudo -s
— Enter password: “loadtest” - vim /etc/hosts
- Replace IP address of ‘loadtest.ofbiz.us’ with <PRIVATE_IP> of ‘Ofbiz-LoadTest-Apache-Instance‘
- Add IP address of ‘loadtestdb’ with <PRIVATE_IP> of ‘Ofbiz-LoadTest-MysqlDB-Instance‘
- Save and quit
IV. Steps to start, stop and check the status of the ofbiz instance
Login into the ofbiz server via ssh and then perform the following operations.
a) Start instance: svc -u /service/loadtest.ofbiz.us
b) Stop instance: svc -d /service/loadtest.ofbiz.us
c) Check instance status: svstat /service/loadtest.ofbiz.us
V. Steps to execute the JMeter scripts
We have used a single machine with two JMeter instances to make up the two users “jmeter1” and “jmeter2”. Each user will have separate JMeter and jdk setups available for their use.
Jmeter1:
- ssh jmeter1@<<PRIVATE_IP> of Jmeter Instance>
- Enter password: “loadtest”
- Put mysql jdbc connector at apache-jmeter-2.11/lib/
- Go to apache-jmeter-2.11/bin/
- Run script in screen utility
- screen ./jmeter -n -t loadtest-plan/JMeterTestPlanForPlainOfbiz.jmx -l loadtest-plan/log.csv
- ctrl+A+D to detach from screen
Jmeter2:
- ssh jmeter1@<<PRIVATE_IP> of Jmeter Instance>
- Enter password: “loadtest”
- Put mysql jdbc connector at apache-jmeter-2.11/lib/
- Go to apache-jmeter-2.11/bin/
- Run script in screen utility
- screen ./jmeter -n -t loadtest-plan/JMeterTestPlanForPlainOfbiz.jmx -l loadtest-plan/log.csv
- ctrl+A+D to detach from screen
Once you have prepared and tested everything, using one JMeter instance and one User configuration, you can add more JMeter instances on the same machine and run a series of test cases to stress your application. This is how to load test Apache OFBiz on AWS.
Do you have any OFBiz performance issues? Looking for an OFBiz system from HotWax Media? Contact us!
Thanks for your time!


