This OFBiz tutorial is to show you how to manage your different security groups, since just about every business using the OfBiz platform will have a need to set up different security groups within the system. This allows users to be assigned to specific security groups which can only access the areas of the back-end that are pertinent to their jobs.
To create or edit security groups, the user must be an administrator within the system.
Create New Security Group
Prerequisite Data
- None
Execution Steps
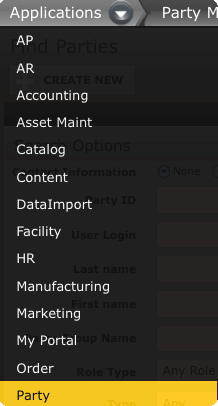
- Go to “Party” component from the “Applications” Menu.

“Party” will be under the “Applications” Menu
- From the “Party Manager” Menu click on “Security” tab.

“Security” is under the “Party Manager” Menu
- Security Group Lists will be displayed.
- Click on “New Security Group” button.

- Fill in following information in “Edit Security Group” form :
- Security Group Id ( Enter unique Id for creating new security group )
- Description ( Enter description about the security group so that it can be easily distinguishable )

An easily identifiable name and description are very helpful for later management of security groups.
- Click on “Update” button.


Expected Outcome
- Added “Security Group” details will be displayed on “Security Group Lists” page.

SAMPLE is now an option to edit in the list of security groups
Assign Permissions to Security Group
Prerequisite Data
- Security Permissions should exists in system.
- Security Group should exist in system.
Execution Steps
- Go to “Party” component from the “Applications” Menu.
“Party” will be under the “Applications” Menu
- From the “Party Manager” Menu click on “Security” tab.
“Security” is under the “Party Manager” Menu
- Security Group Lists will be displayed.
- Select a security group by clicking on “Security Group Id” button.

We will use the “SAMPLE” id that was created in the last section of the tutorial
- Click on “Permissions” tab.

- Select permission Id from drop down in “Add Permission(Listed) to Security Group” section.

There are a number of permissions that can be set up and assigned to security groups
- Permission can be added manually by filling in “Permission Id” in “Add Permission (manually) to Security Group” section.

- Click on “Add” button.


Expected Outcome
- Added permission will be displayed in “Edit Security Group Permissions” section with following details :
- Permission Id
- Remove

You can click the “Remove” button on this screen if you need to remove permissions

Add User(s) to Security Group
Prerequisite Data
- Security Group should exist in system.
- User Login(Users) should exist in system.
Execution Steps
- Go to “Party” component from the “Applications” Menu.
“Party” will be under the “Applications” Menu
- From the “Party Manager” Menu click on “Security” tab.
“Security” is under the “Party Manager” Menu
- Security Group Lists will be displayed.
- Select a security group by clicking on “Security Group Id” button.
We will use the “SAMPLE” id that was created in the first section of the tutorial
- Click on “User Logins” tab.

- Fill in following information in “Add User Login to Security Group” form :
- User Login Id
- From Date

Note: a “Thru Date” is usually not set unless the user will only have temporary access to the security group
- Click on “Add” button.

Expected Outcome
-
- Added user login details will be displayed on “Userlogins for Security Group” page with following details :
- User Login Id
- From Date
- Thru Date (If exist)
- Party ( Party associated with user login )
- Remove
- Click on “Remove” button to remove user login from Security Group.
- Update
- Click on “Remove” button to update user login for Security Group.
- Added user login details will be displayed on “Userlogins for Security Group” page with following details :
![]()
—Chris Gaughan—

Chris Gaughan is an OfBiz Designer specializing in Client Training and Support for HotWax Media.